Monday, July 9, 2012

Homemade Fruit Snacks


Harper came home today!  Woot woot!!!  With his impending arrival I decided that I needed to make him something special and I thought Fruit Snacks it is! 

I don't know if your child(ren) like fruit snacks as much as Harper does...but around our house we go through a PILE of them every week so I set out a while back to find a recipe to make homemade fruit snacks.  I was a little unsure of the recipe at first but after making them for the first time...they were a HUGE HIT!  This was my 3rd or 4th time making them!

While these aren't actually made with fruit they are easy and they only take 3 ingredients to make...a box of jello, 2 packets unflavored gelatin, and 1/3 cup water.


All you do is simply put 1/3 cup water in a pot and sprinkle both packets unflavored gelatin and the jello in the water...

Once you have all 3 ingredients combined you simply stir (I wisk) and heat until the jello/gelatin are disolved...

I actually, tip my pot occassionaly on its side (it makes the wisking easier)...


Once all the jello is disolved, simply pour it into your molds...I actually pour mine back into the measuring cup to make filling my molds a little easier...


I then pour the jello/gelatin mixture into my molds (which I got at the Dollar Tree for $1 each)...


Don't worry about making a mess on your molds with the jello mixture, it will literally just peel off when it dries/hardens.  Let the jello mixture cool and firm up for about 30 minutes...the longer you let it set the easier they are to remove however.  I usually let mine sit on the counter for a few hours (more or less because I get busy and forget!)!  Once the jello has cooled and firmed up you simply pull them out of the molds (they should just pop right out)...


Yes, I know my star molds are slightly large for "fruit snacks" but I just give Harper 2-3 of them instead of a hand full.  You can also pour the jello mixture directly into a shallow pan and cut into bite size pieces.


HAPPY 'MOMMYING' :)

Sunday, July 8, 2012

Blog Hiatus

Sorry we have taken a short hiatus from blogging the last week.  Gigi (my mom), and Aunt Robyn came on Thursday morning for a quick 24 hour visit!  It was quick, but it was a GREAT visit.  Between Gigi, Aunt Robyn, and myself we laughed the ENTIRE 24 hours (a lot of the jokes were directed at Gigi, and of course, Aunt Robyn...they are easy targets after all!).  None the less it has been, once again, a crazy busy, but fun, week...and therefore, the hiatus in blogging!

Harper also left Friday afternoon with Gigi and Aunt Robyn for a mini vaca at Gigi and Papa's!  When I call to check on him every morning and afternoon and hear all the fun everyone is having, im really unsure who is having more fun...Harper or Gigi and Papa!  I venture to say that Gigi and Papa are the ones who are having the most fun! 

Mama told me yesterday that she took Harper to the nursing home, where MY grandfather is currently (they were having an "ice cream social"), to visit.  He got to join in on the ice cream festivities (FUN...well maybe minus the old folks!)!  Anyways, back on topic, mama said after eating his ice cream he got down and she said LITERALLY went around to EVERY person in the room and told each and every one of them "HEY"!  And if you know my child it probably came out more like a "HAY" or a "HAAY"!  Ha!  My little country boy!  I kinda miss the kid!

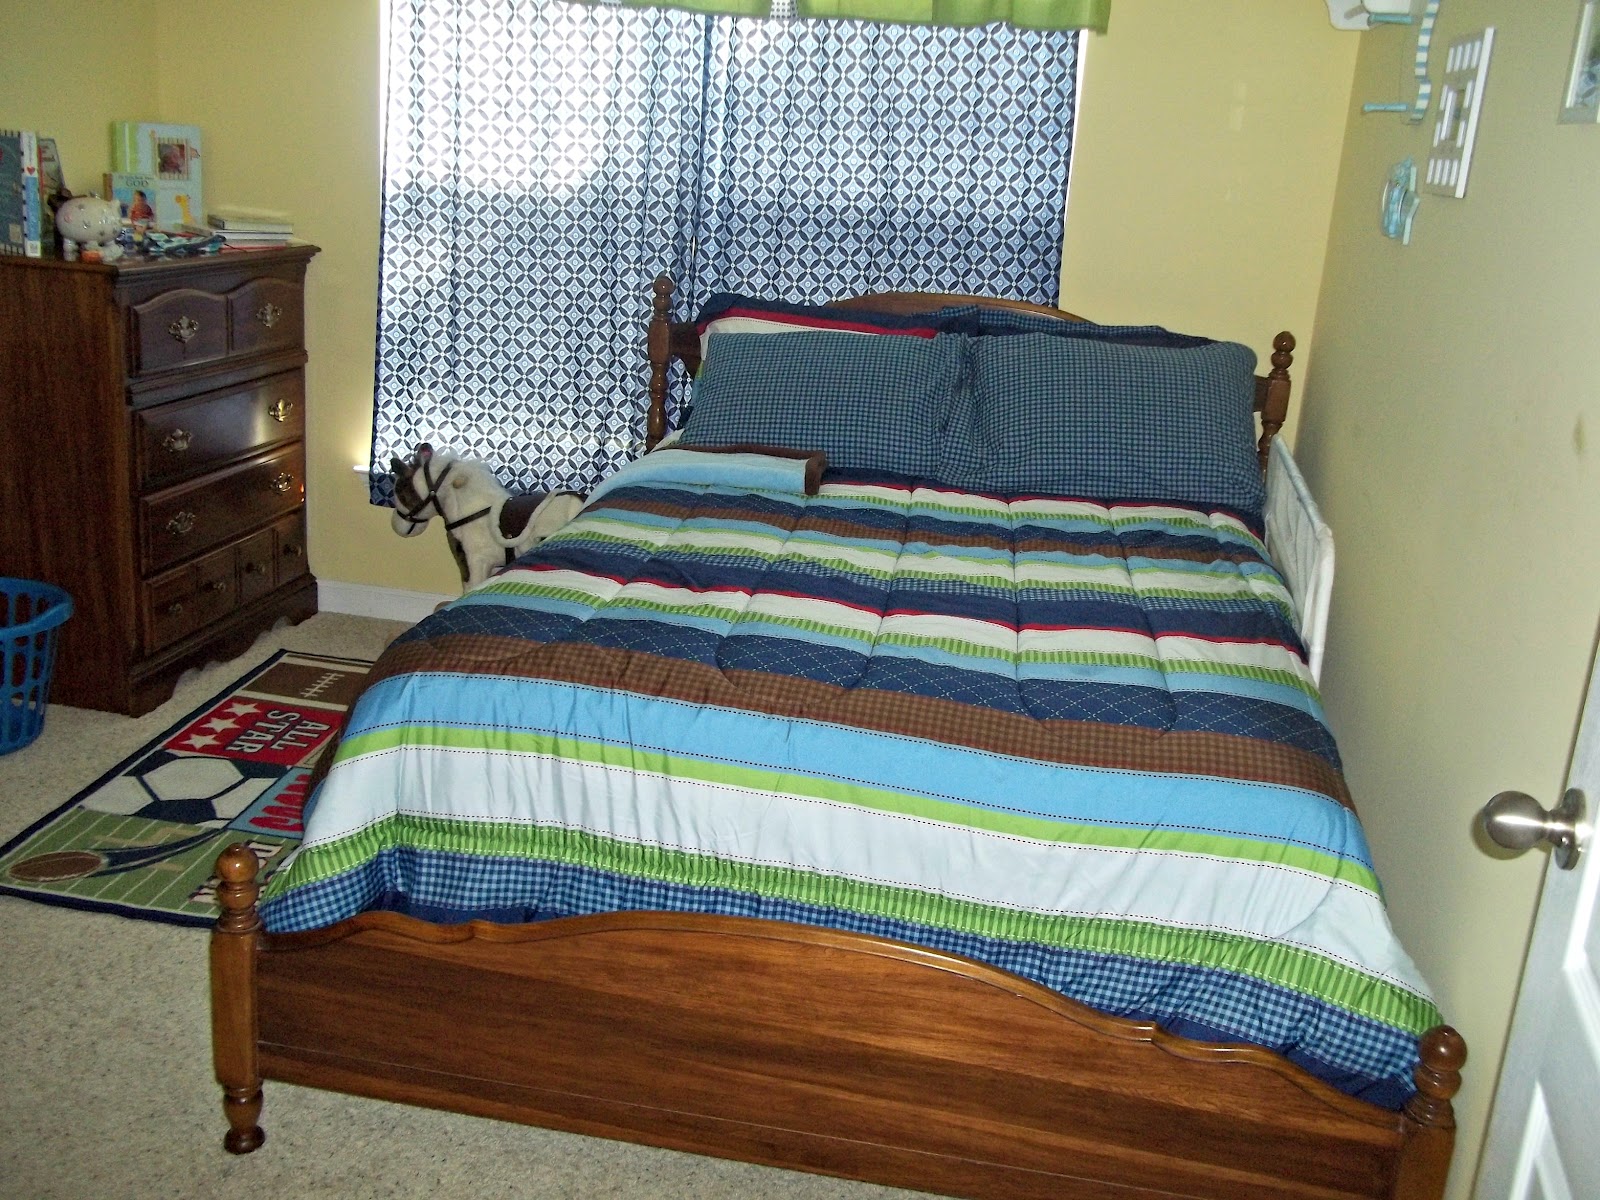
With Harper being gone I have no amazingly yummy recipes for you...sorry.  :(  However, I have some SUPER cute pics of Harper's new "big boy" bed room!  Due to all of our sleeping problems (that have basically gone on for a over a year) we transitioned Harper's bed from crib to toddler bed months ago.  This seemed to help for a little while.  However, the kid moves like the bed under him is on fire and he started FALLING OUT of the darn thing!  We eventually just got rid of the crib/toddler bed all together and were borrowing my in-laws roll away bed until we could get mattresses and a "big boy" bed.

It all came together today...finally!  And I am pleased...no, im THRILLED to say that it turned out perfect!


Don't freak, the bed is only a full size bed.  And all the furniture came from Christopher's uncle.  Actually, Christopher's Grandma Lucy bought the furniture YEARS AGO for Christopher's Uncle before she passed and wrote on the reciept "when you're done using furniture Christopher gets it!"!  Said Uncle actually has the reciept still!  Well, needless to say we got the furniture and put it in Harper's room with the ever so great help of Grams and Pops (Christopher's parents)! 

Since he is still with Gigi and Papa he hasn't seen everything yet....but, I KNOW that he will be so HAPPY!  And, I know that Grandma Lucy is in Heaven looking down smiling!!!

I would love to spark a conversation about sleeping habits, beds, etc. so feel FREE to leave comments!


HAPPY 'MOMMYING' :)

Friday, July 6, 2012

BATHTIMEFREEBIES

The first thing I have for you tonight is a free 1 year subscription to Better Homes and Gardens!!!  When I saw this I squealed like a kid...finally, a free magazine for mama!!!

I also have a free apron for you!!!  You can also share the deal anywhere (like on FB) and get a matching oven mit!!!  WOOT WOOT!!

HAPPY 'MOMMYING' :)

Tuesday, July 3, 2012

Ice Bricks

Today was another scorcher!  If it were strictly up to me (I know, im the mother, it SHOULD be strictly up to me) I would stay locked in the house all day.  However, Harper is an outside boy!  After being inside ALL DAY yesterday, we had no choice but to play outside today! 

Trying to come up with fun ideas to stay cool in the heat, I yet again, tried a new idea I found a while back...Ice Bricks!  Basically they are just big ice cubes maid in a muffin tin!  You can fill them with anything you wish, as to make them more fun!

You simply add whatever "fillers" you wish to the empty muffin tins (I put in some green macaroni...you can't see it in this picture!), then you just add water (I also added food coloring) and freeze over night.


Once you let them freeze over night you simply remove them from the muffin pan.  It sounds harder than it actually is, I simply hit my muffin tin on my counter a few times and they popped right out (you can see the green macaroni now!)!

I then took the Ice Bricks outside and added them to Harper's kiddie pool (yes, we have a big pool, but we invested about $10 in a kiddie pool for him to play with in the drive way....best thing we ever did!)


You can see he had already been in the pool by the abandoned sippy cup!  However, it didn't take very long for them melt...


...the green macaroni is coming out!!!  I have to say, I thought this would have been more of a hit than it actually was.  He was really not that interested.  Actually, I had to drag him back to the pool to take this picture...


Im thinking that if I put better things in the Ice Bricks next time he will be more interested.  Oh, and making sure the water hose isn't around to play with!!!  With better "fillers" and in a smaller tub it would be much better!

HAPPY 'MOMMYING' :)

Scorching heat

Most of you know the horrendous heat we have experienced the last week or so.  If you do not know what im talking about, let me fill you in...currently (Monday morning)  The Weather Channel has a temperature of 88 that feels like 98!  And thats really nothing, over the weekend the heat index was 120-125! 

Sunday Christopher decided that he wanted to clean out the garage...


No I didn't really help....I just watched...but thats what happens when you have a rockin husband!!!  Needless to say, we were outside all day again yesterday.  Once again, we were all tuckered out by bed time (Harper's bed time that is)! 

After losing power to a horrendous storm last night and being up in the hot air all night, I made the executive decision that we were NOT going outside today (in the sun) for any reason!  So, that got me thinking, what do you do when its hot and can't play outside?  Well, you play inside (clearly, duh!)!

But I was thinking what fun new activities could we try?  I found a recipe for coloring rice, (for rice play) online a while back....and, well, I decided to try it!  It was pretty easy to do, and Harper thoroughly enjoied "digging" and playing in the rice, in the garage!  You only need a few ingredients...


You will need a bag of rice (duh, I just used dollar store rice...no need for the good stuff!), rubbing alcohol, food coloring (the old fashioned liquid kind), Zip Loc Bags, paper towels, and you will also need pans.

To color the rice you simply put 4 tsp rubbing alcohol into the Zip Loc Bag and add the desired amount of food coloring (the more food coloring you add, the darker your rice will be)...

Next you simply add 2 cups rice to the bag, and shake until you get the desired color...


Once you obtain the desired color, simply spread the colored rice on paper toweled lined pans...


...once the rice is dry (it only took about 30 mins or so for mine to dry) you simply put the rice into desired container for play...


I did 2 baggies of blue rice (equaling 4 cups blue rice) and 2 baggies of red rice (equaling 4 cups red rice) and then I poured the remaining uncolored rice into our container to make red, white, and blue rice for July 4th!!!!

He had a blast using the beach toys to "dig", sift, and simply make a complete mess!!!


HAPPY 'MOMMYING' :)

Sunday, July 1, 2012

BATHTIME FREEBIES

FYI: This was started and half written on Thursday (gotta work in advance so I can get things up!), but I completely failed at getting it posted. 
The first BATHTIME FREEBIE I have for you tonight is a FREE COMPUTER WALLPAPER from no where else, but the Georgia Sea Turtle Center!!!  WOOT WOOT!!!  :)

I also have a  link to a free 2 year subscription to lego magazine! Who doesn't love legos?!!  This may be more for older children but it should be fun for youngsters to look at also....may even give mom and dad a few ideas too!!  I suppose....I haven't actually seen one.  But I did sign Harper up!

Finally, I want to just open your ears to a neat-o program, it's called the New Balance Wear Test Program.  You basically apply to the program (just like a job) and if you are accepted you get to test New Balance products.  Now, at the end of the test period you do have to send the product back, but how cool is that.  Im just going to share a few pics of the shoes I just recieved!  I must say they are pretty sweet!!!

Harper even liked the shoes!!!

HAPPY 'MOMMYING" :)

Family Reunion

Sorry the posts have been few and far between the last few days.  My mom was here for several days and we had a family reunion yesterday.  Needless to say, it's been a little nuts around here, and my house shows it!  I promise things will get caught up between today and tomorrow.  So, when you see several new posts coming your way....no worries, thats just the slacker catching up!!  :)

I mentioned we had a family reunion yesterday, and let me tell you the South Georgia heat was horrendous!  Im pretty sure im still suffering from all the heat we endured yesterday (talk...about...a...HEAD...ACHE!).  However, it was super seeing family! 

As with any family reunion you have to cook your booty off before you go!  And, since we have become regular "BBQ-er's" (wait, is that a word...it is now!) we took a smoked Pork Butt and homemade Loaded Potato Salad (complete recipe at the bottom of blog). 


The first time we had this potato salad was at a local BBQ restaurant (I canNOT express to you just how much my family LOVES...yes, I said it, LOVES BBQ)!!! About the time we got back in the car to leave the joint, Christopher said you HAVE to figure that one out!  We were hooked.  So, I did, and it runs a close race with the restaurant's!! 

This particular potato salad has a lot of steps, and can be time consuming...but, it is TOTALLY worth it.  In addition to boiling potatoes (REMEMBER, make sure EVERYTHING you do with potatoes, you do with COLD WATER ONLY)...

You also have to chop green onions...


Finally, you have to make HOMEMADE BACON BITS (YUMM!!!)...


I know, this sounds like a lot to do just to make potato salad...but I promise, it is totally worth it.  You will also add some shredded cheddar cheese and mix all together with nothing else but RANCH DRESSING! 

Christopher also grilled 2 Pork Butts (which I cannot give the recipe out for...sorry, its a secret!)!  But I will give you the recipe for my homemade BBQ Sauce!!


HOMEMADE BBQ Sauce


-1 1/2 Cups Brown Sugar (you can use either dark or light...whichever you prefer, I ALWAYS have light on hand)
-1 1/2 Cups Ketchup
-1/2 Cup Red Wine Vinegar
-1/2 Cup Water
-1 Tbl Spoon Worcestershire Sauce (WE ALWAYS USE French's...it's very THICK)
-2 1/2 teaspoons ground mustard
-2 teaspoons Paprika
-1 1/2 teaspoons salt
-1 teaspoon pepper (you can use more if you want it a little more spicy)


1.) Mix all ingredients in a bowl and wisk until sugar is disolved.
2.) Store in an airtight containter.


Loaded Potato Salad

-1/2 of a 5lb bag Red Potatoes (more if you are feeding an army!)
-1 bunch green onions chopped
-1 pound Bacon
-1 Bag shredded Cheddar Cheese
-Ranch Dressing, to taste
-Salt
-2 Tbl Spoons Oil (whatever you have on hand, I usually keep Olive Oil around)


1.) Wash, peel, and dice pototes into big chunks.
2.) Place pototes into pot with cold water and salt water.
3.) Bring potatoes to boil and cook JUST UNTIL FORK TENDER.
4.) Dice bacon into chunks.
5.) Place bacon chunks and oil into skillet and cook bacon until brown.
6.) Wash, and dice Green Onions.
7.) When Potatoes are fork tender drain and place in bowl.
8.) Once potatoes have cooled down slightly, place potatoes in fridge to cool COMPLETELY (THIS IS EXTREMELY IMPORTANT, you do NOT want the pototes hot or your cheese will melt and as good as melted cheese is, it's NASTY in this recipe).
9.) Once pototes have cooled, add bacon bits, green onions, and cheese.
10.) Mix in Ranch Dressing (enough to combine all ingredients and to your taste).
11.) Cool and enjoy!

HAPPY 'MOMMYING" :)